AiChat
A simple UI to interact with various llm backends: openai, groq, fireworksai and togheterai
What is AiChat?
AiChat is an open-source chat interface designed to easily test multiple LLMs from the same web app. This tool is particularly useful for developers and researchers who want to compare different language models’ outputs in a single, cohesive interface.
Features
- Supports multiple LLM backends: OpenAI, Groq, FireworksAI, and TogetherAI.
- Chats are automatically saved in the MongoDB database.
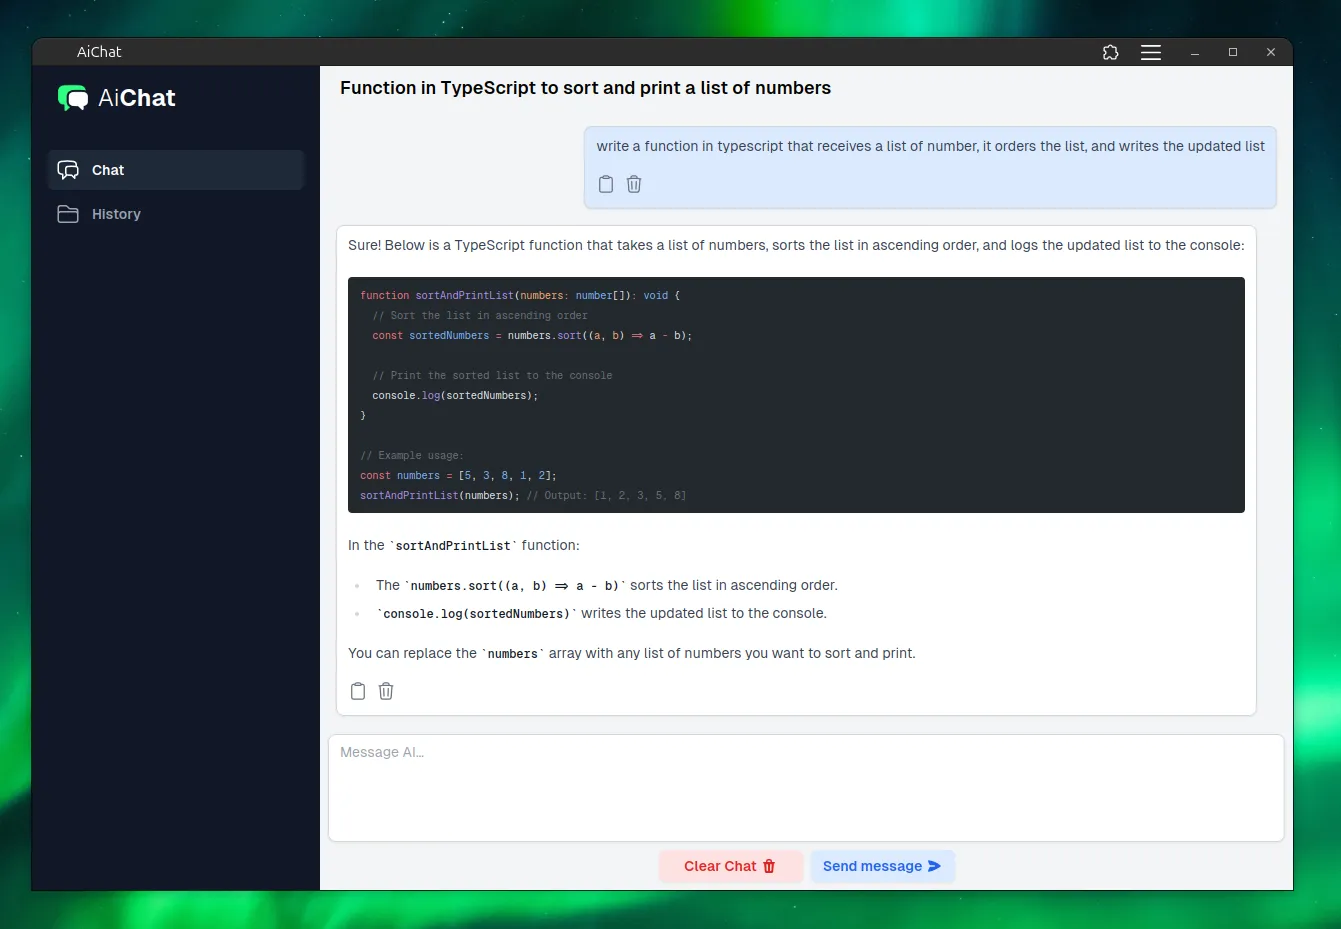
- Code snippets generated by the AI are automatically syntax-highlighted based on the detected language.
- User-friendly web interface built with SvelteKit.
Technology Stack
- Frontend: SvelteKit
- Backend: Node.js
- Database: MongoDB
Screenshots
Authentication Page

Chat UI
Chat History

Getting Started
Follow these steps to set up and run AiChat on your local machine.
Prerequisites
- Node.js and npm (or pnpm)
- MongoDB server (You can use MongoDB Atlas for a free hosted MongoDB instance)
Installation
-
Clone the repository:
git clone https://github.com/polly3223/AiChat cd AiChat -
Create a
.envfile at the root of the project with the following structure:SECRET_MONGO_CONNECTION=mongodb+srvXXXXXXXXXXX SECRET_PSW=XXXXXXXXXXX SECRET_TOGHETERAI_API_KEY=XXXXXXXXXXX SECRET_GROQ_API_KEY=XXXXXXXXXXX SECRET_FIREWORKS_API_KEY=XXXXXXXXXXX SECRET_OPENAI_API_KEY=XXXXXXXXXXXThe MongoDB connection string, a password, and at least one API token from one of the AI service providers are required.
-
Set up the AI client: Based on the API service you want to use, go to the file
aiAdapter.tsand uncomment its relative line:// export const aiClient: AiClient = new GroqClient(); // export const aiClient: AiClient = new ToghetherAiClient(); // export const aiClient: AiClient = new FireworksAiClient(); export const aiClient: AiClient = new OpenAiClient(); -
Install the dependencies:
pnpm install -
Run the project:
pnpm dev
Deployment
Deploy on Railway
- Fork the repository: This allows you to make changes easily.
- Login to Railway and select the forked repository from your GitHub:
- Insert the environment variables from the Railway UI and run the automatic build:
You can also choose to deploy the project on your own VPS following similar steps by configuring your server and setting the environment variables.
Contributing
Contributions are welcome! If you have any ideas or improvements, feel free to open a pull request or raise an issue.
Future Plans
There is no clear roadmap as of now. We welcome ideas and suggestions from the community to help shape the future of AiChat.
License
This project is licensed under the MIT License.